前言
接触Spring也有一段时间了, 今天来系统的记录一下Spring的学习过程。
构建
SpringBoot项目的构建非常简单, 只需要在这里选择自己所需要的依赖, 并指定构建工具, 具体如下图:
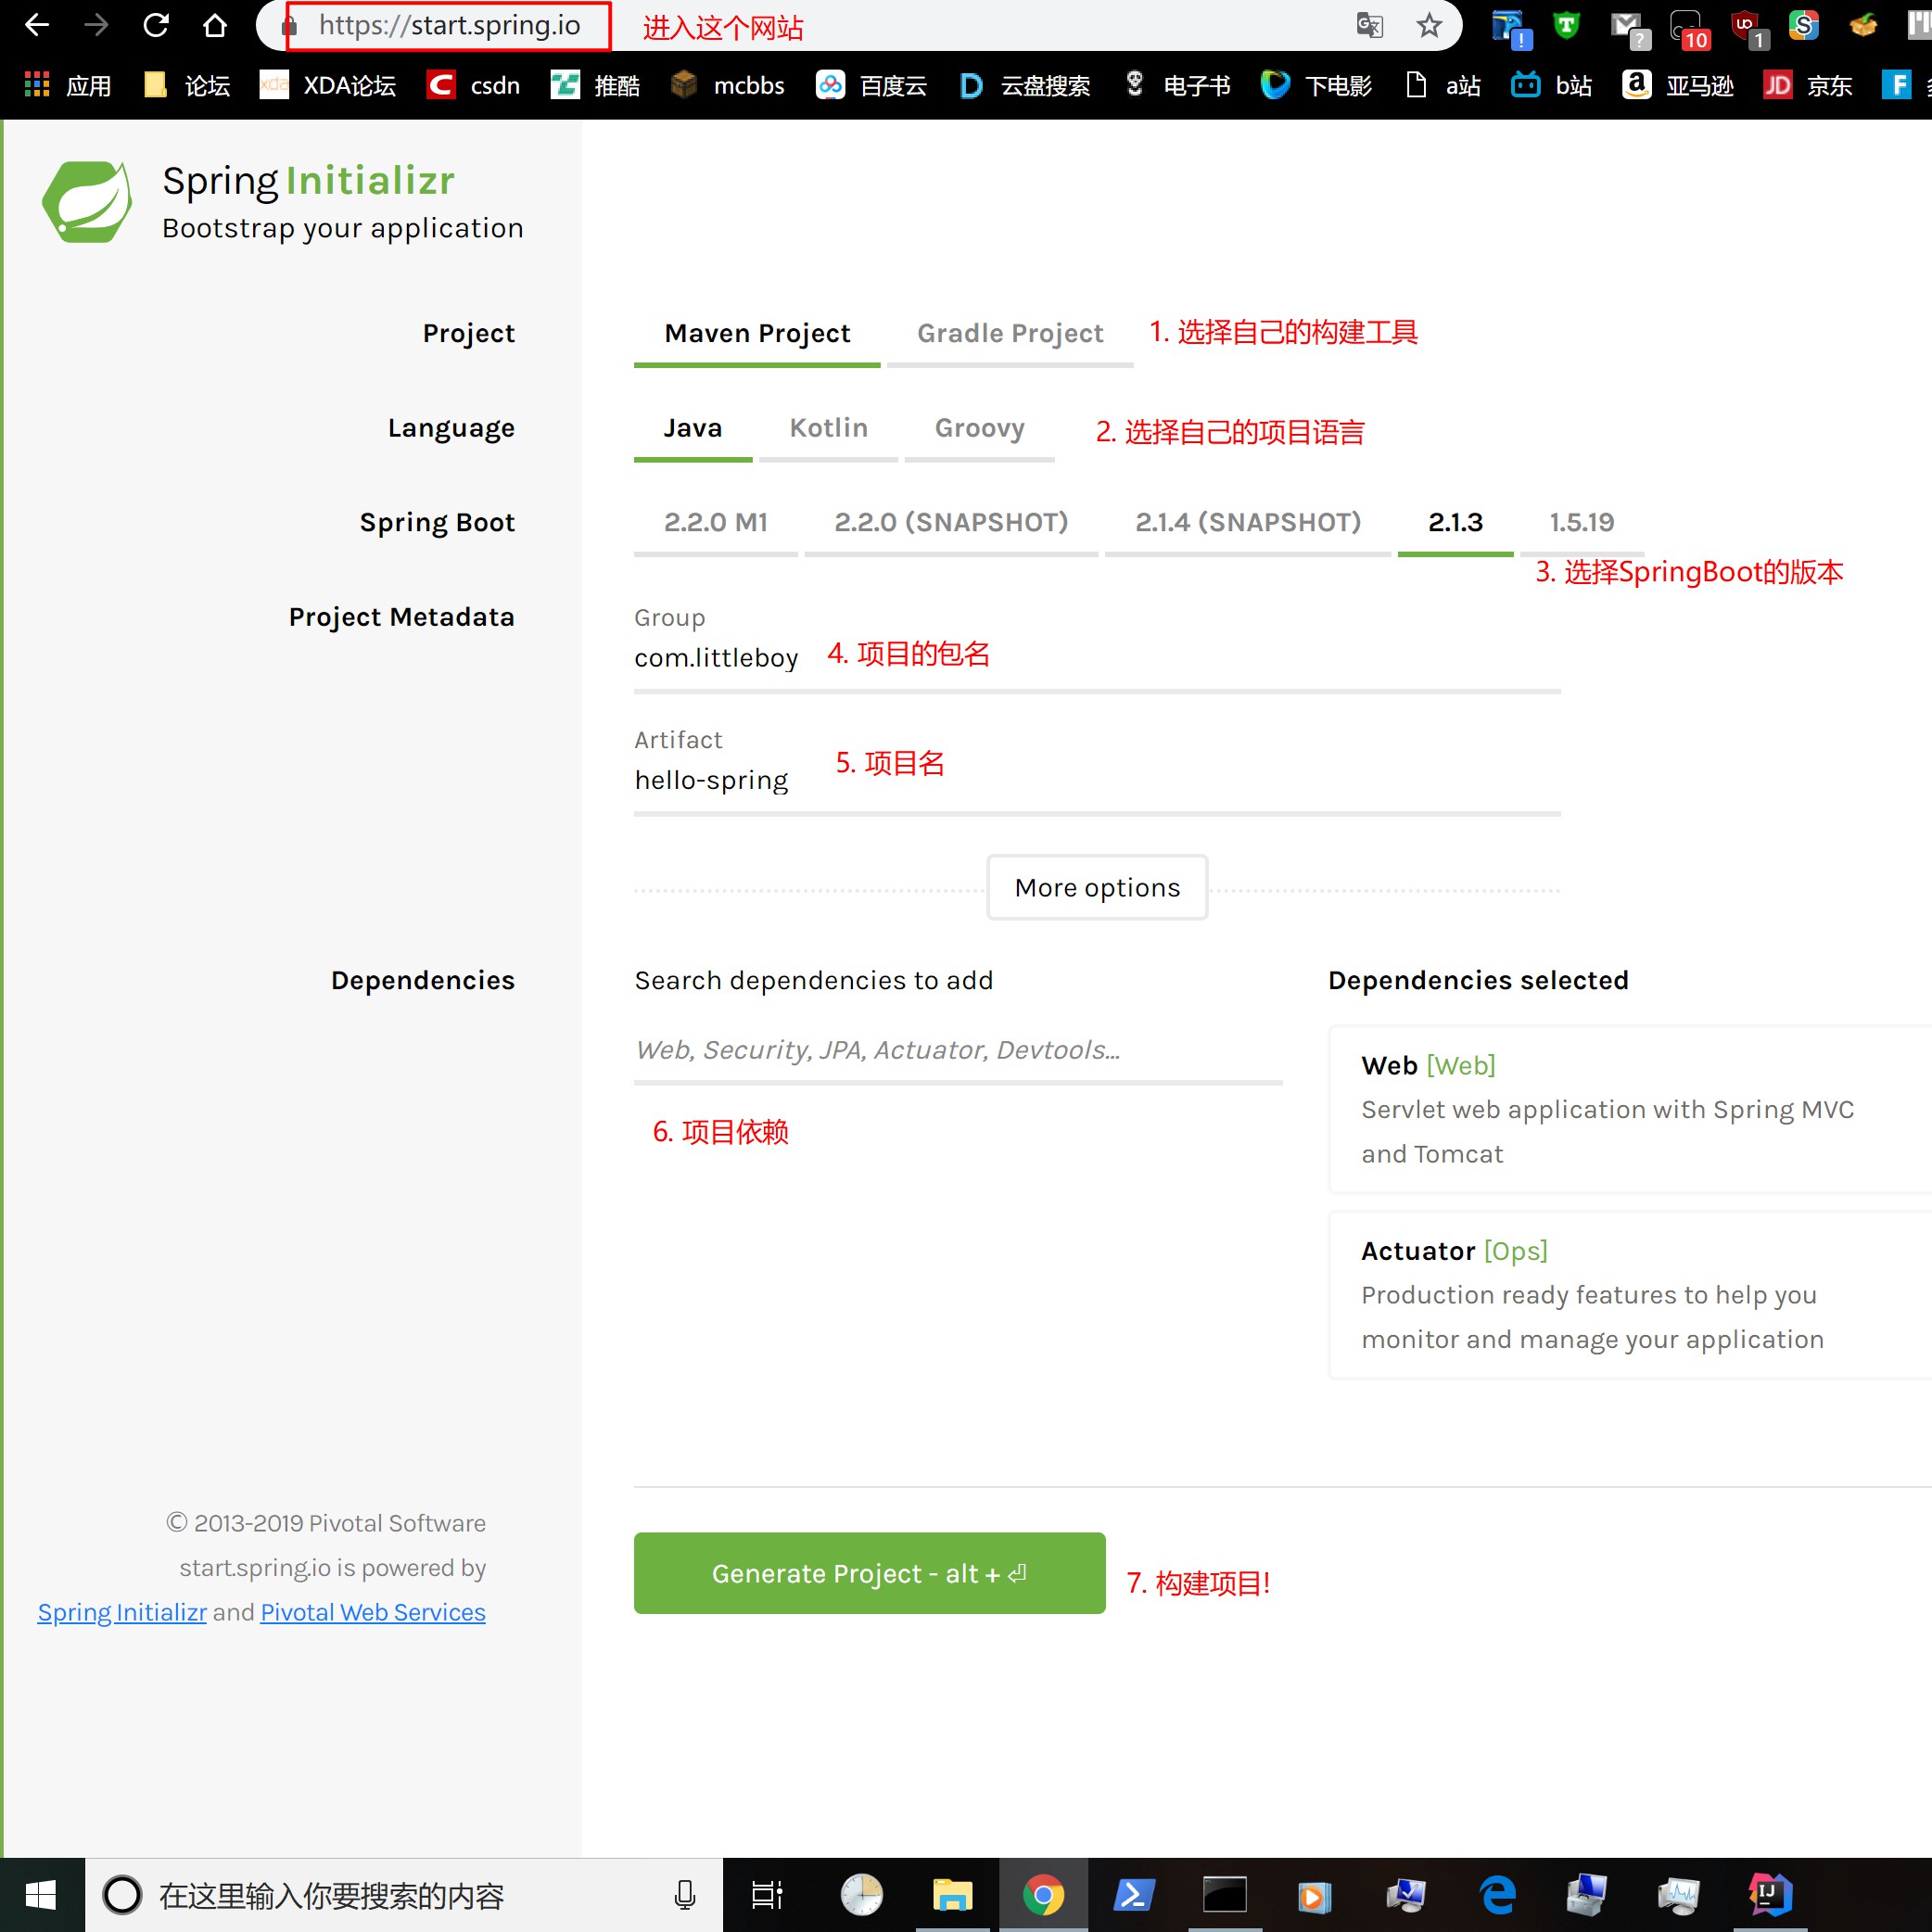
接着会将你构建的项目以压缩包的形式下载下来。我们的项目就构建完成了, 非常简单。
Spring之HelloWorld
将我们的项目使用ide打开之后, 编写我们的第一个controller, 让它返回一个HelloWorld字符串。
先看一下我们的项目的目录结构:
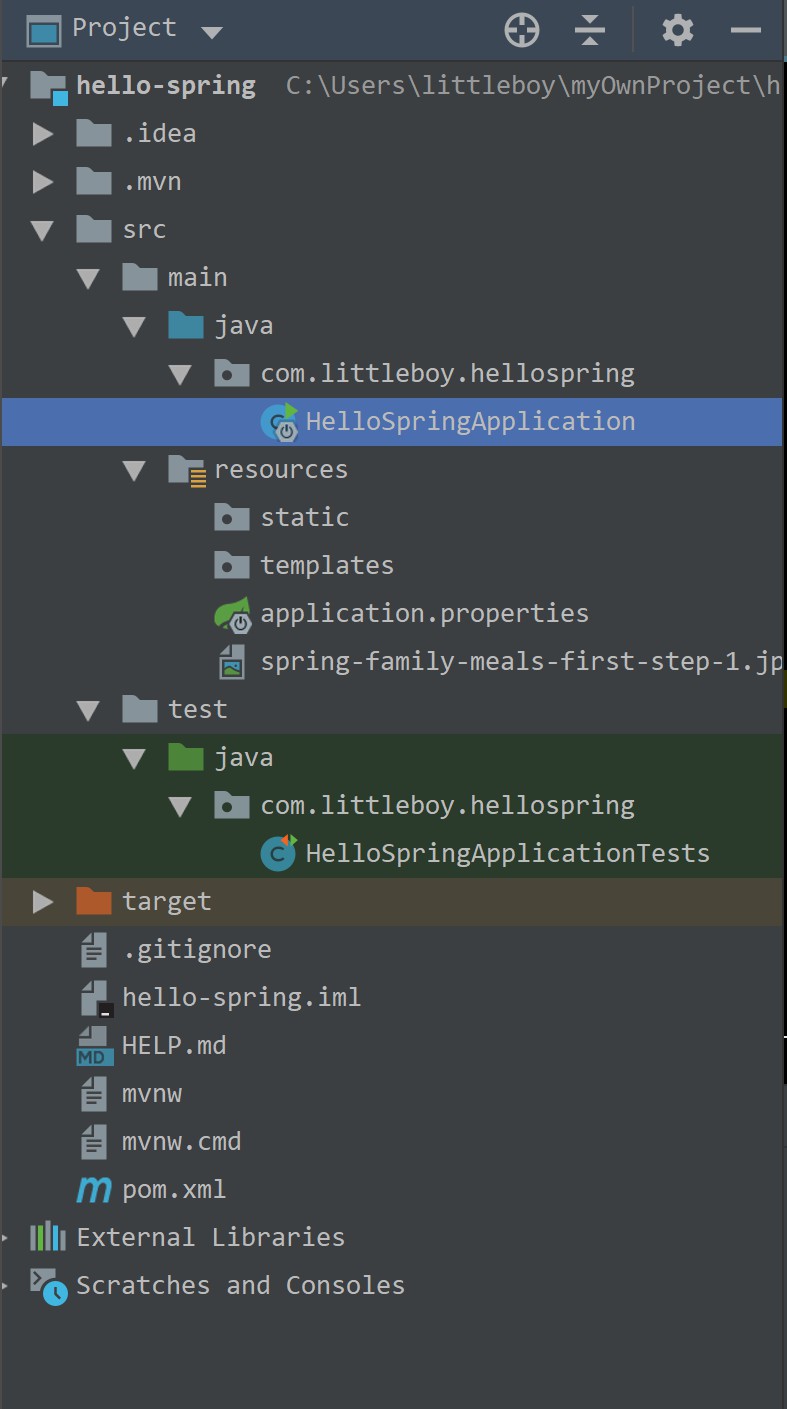
为了方便起见, 我们就在名为HelloSpringApplication的文件中进行编写:
1
2
3
4
5
6
7
8
9
10
11
12
| @SpringBootApplication
@RestController
public class HelloSpringApplication {
public static void main(String[] args) {
SpringApplication.run(HelloSpringApplication.class, args);
}
@RequestMapping("/hello")
public String hello() {
return "HelloWorld";
}
}
|
OK, 注意, @RestController注解和hello方法是我们自己编写的, 现在打开一个Terminal来测试我们的Controller:
1
| curl http://localhost:8080/hello
|
如果结果是HelloWorld字符串, 则说明我们成功啦!
依赖
接下来我们看一下pom文件:
1
2
3
4
5
6
7
8
9
10
11
12
13
14
15
16
17
18
19
20
21
22
23
24
25
26
27
28
29
30
31
32
33
34
35
36
37
38
39
40
41
42
43
44
45
46
47
| <?xml version="1.0" encoding="UTF-8"?>
<project xmlns="http://maven.apache.org/POM/4.0.0" xmlns:xsi="http://www.w3.org/2001/XMLSchema-instance"
xsi:schemaLocation="http://maven.apache.org/POM/4.0.0 http://maven.apache.org/xsd/maven-4.0.0.xsd">
<modelVersion>4.0.0</modelVersion>
<parent>
<groupId>org.springframework.boot</groupId>
<artifactId>spring-boot-starter-parent</artifactId>
<version>2.1.3.RELEASE</version>
<relativePath/>
</parent>
<groupId>com.littleboy</groupId>
<artifactId>hello-spring</artifactId>
<version>0.0.1-SNAPSHOT</version>
<name>hello-spring</name>
<description>Demo project for Spring Boot</description>
<properties>
<java.version>1.8</java.version>
</properties>
<dependencies>
<dependency>
<groupId>org.springframework.boot</groupId>
<artifactId>spring-boot-starter-actuator</artifactId>
</dependency>
<dependency>
<groupId>org.springframework.boot</groupId>
<artifactId>spring-boot-starter-web</artifactId>
</dependency>
<dependency>
<groupId>org.springframework.boot</groupId>
<artifactId>spring-boot-starter-test</artifactId>
<scope>test</scope>
</dependency>
</dependencies>
<build>
<plugins>
<plugin>
<groupId>org.springframework.boot</groupId>
<artifactId>spring-boot-maven-plugin</artifactId>
</plugin>
</plugins>
</build>
</project>
|
通过这个pom我们可以看出这个项目直接将springframework.boot作为父项目来继承, 所以在声明依赖时不需要指定版本。
接下来我们可以看到声明了一个插件, 这是一个maven打包插件, 可以通过这个插件将整个项目打包为一个jar包, 并且这个jar包是一个可执行的jar包, 那么我们来试一下:
1
| mvn clean package -Dmaven.test.skip
|
执行完之后, 会在target文件夹下生成, 可以直接通过java -jar的命令来执行。
不通过继承父项目的方式来使用SpringBoot的依赖
如果我们的项目需要继承其他的项目, 不能继承SpringBoot, 那么可以通过:
1
2
3
4
5
6
7
8
9
10
11
12
13
14
15
16
17
18
19
20
21
22
23
24
25
26
27
28
29
30
31
32
33
34
|
<dependencyManagement>
<dependencies>
<dependency>
<groupId>org.springframework.boot</groupId>
<artifactId>spring-boot-dependencies</artifactId>
<version>2.1.3RELEASE</version>
<type>pom</type>
<scope>import</scope>
</dependency>
</dependencies>
</dependencyManagement>
<dependencies>
</dependencies>
<build>
<plugins>
<plugin>
<groupId>org.springframework.boot</groupId>
<artifactId>spring-boot-maven-plugin</artifactId>
<version>2.1.3RELEASE</version>
<executions>
<execution>
<goals>
<goal>repackage</goal>
</goals>
</execution>
</executions>
</plugin>
</plugins>
</build>
|
的方式, 将整个SpringBoot的pom全部import进来, SpringBoot的插件声明为repackage的时候会执行打包动作, 以这样的方式可以实现和parent的方式一样的效果。
这里要注意, 如果使用了这种方式将springboot引入进来, 就需要声明springboot的maven插件的版本号, 不然在打包的时候会报jar中没有主清单属性。